Complete Guide
Leather Repair Guide
Everything you need to know about repairing leather furniture and car interiors, from DIY fixes to professional restoration.
DIY vs. Professional Repair: When to Choose Each
DIY Friendly
Suitable for homeowners comfortable with basic crafts and willing to invest time learning techniques.
Good for:
- Small scratches under 2cm
- Light scuffs and surface marks
- Minor colour fading (no cracks)
- Preventive conditioning
Pros:
- • Lower upfront cost ($50–$150 in supplies)
- • Learn valuable maintenance skills
- • Immediate action on minor issues
Cons:
- • Risk of making damage worse
- • Colour matching is very difficult
- • Results may be uneven or short-lived
- • Time-consuming learning curve
Professional Repair
Best choice for visible damage, complex repairs, or when quality and longevity matter.
Best for:
- Tears, cracks, and deep damage
- Colour restoration & matching
- Burns, pet damage, structural issues
- High-value furniture or vehicles
Pros:
- • Perfect colour matching with custom pigments
- • Long-lasting, warrantied results
- • Saves expensive furniture from replacement
- • No learning curve or failed attempts
Cons:
- • Higher cost (but still 70–85% cheaper than new)
- • Need to schedule appointment
Our Professional Repair Process
From assessment to final protective coat, every step ensures durable, beautiful results.
1. Assessment & Preparation
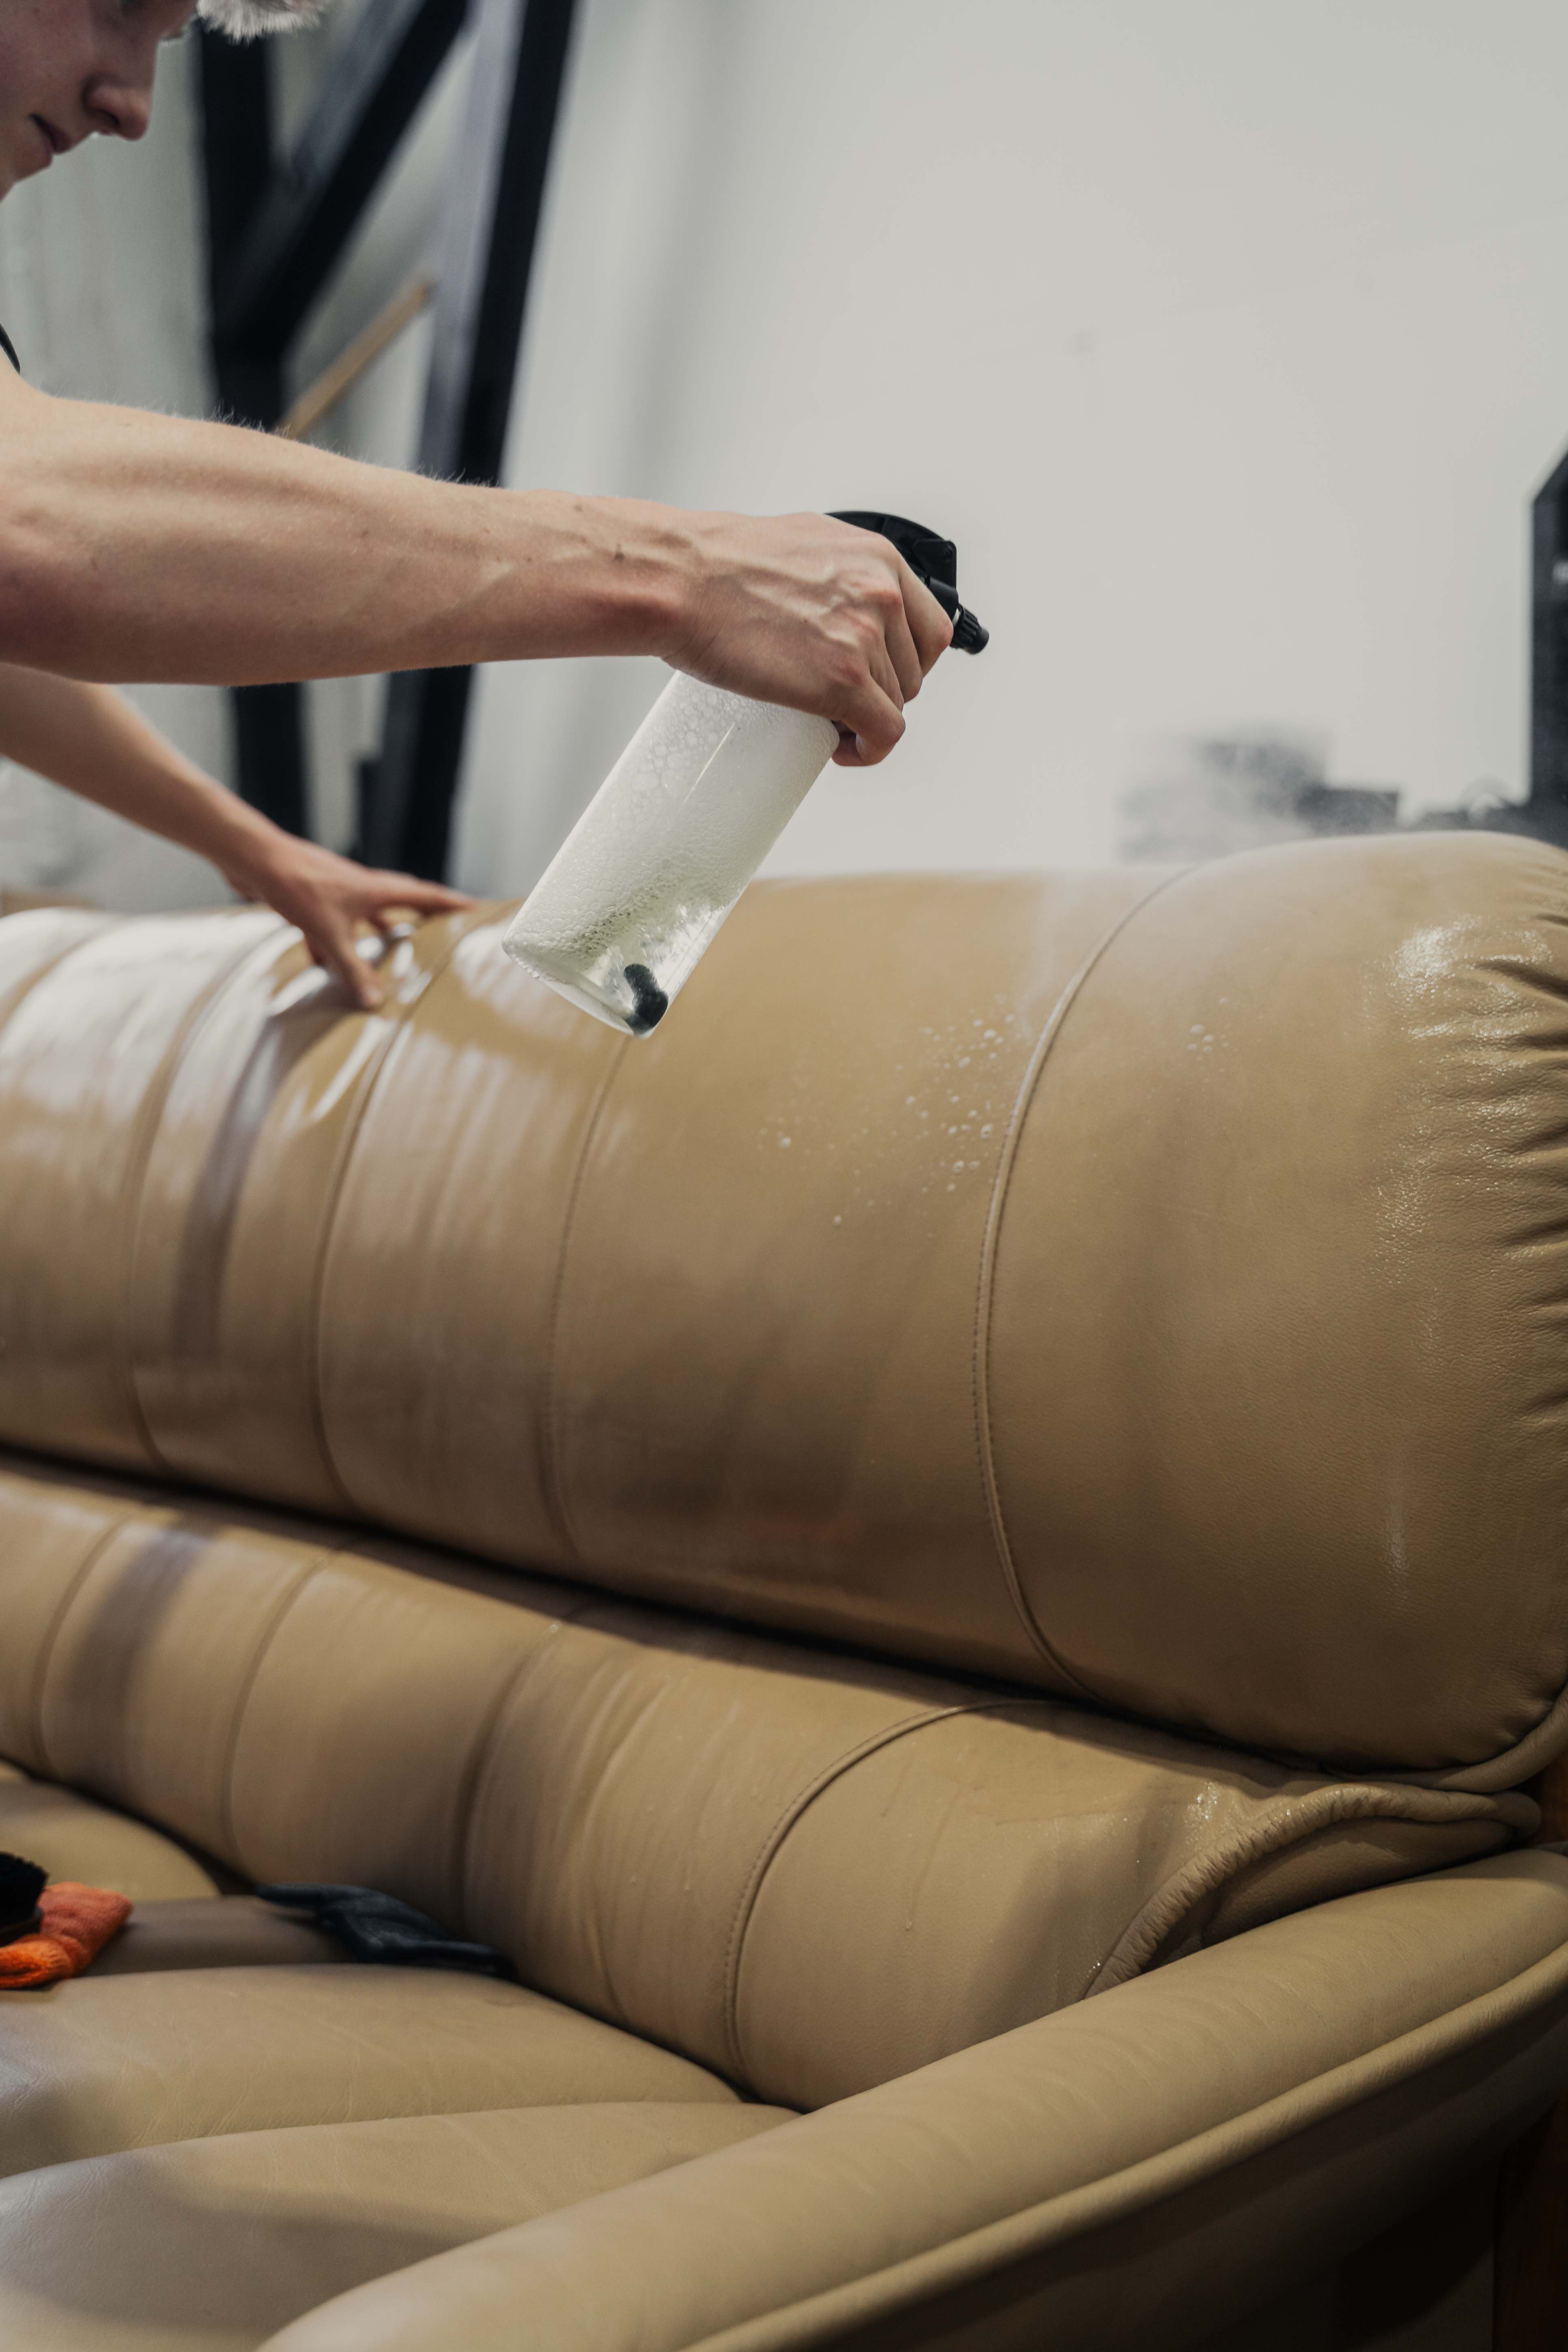
We inspect the damage type, leather grade, and colour. Surface is cleaned with pH-balanced cleaner to remove oils, dirt, and residue. Damaged edges are trimmed or sanded smooth.
2. Filler Application
For cracks and tears, we apply flexible leather filler compound in thin layers. Each layer is dried and sanded until the surface is level with surrounding leather. Deep damage may need reinforcement mesh underneath.
3. Colour Matching & Application
We custom-mix pigments to match your exact leather shade and undertone. Using airbrush or sponge techniques, we apply multiple thin coats, feathering edges to blend seamlessly. Heat-setting between coats ensures adhesion.
4. Topcoat & Protection
A professional-grade sealant (Geist products) is applied to match the original finish—matte, satin, or gloss. This protects against UV, spills, and wear. Final buffing brings out the leather's natural luster.
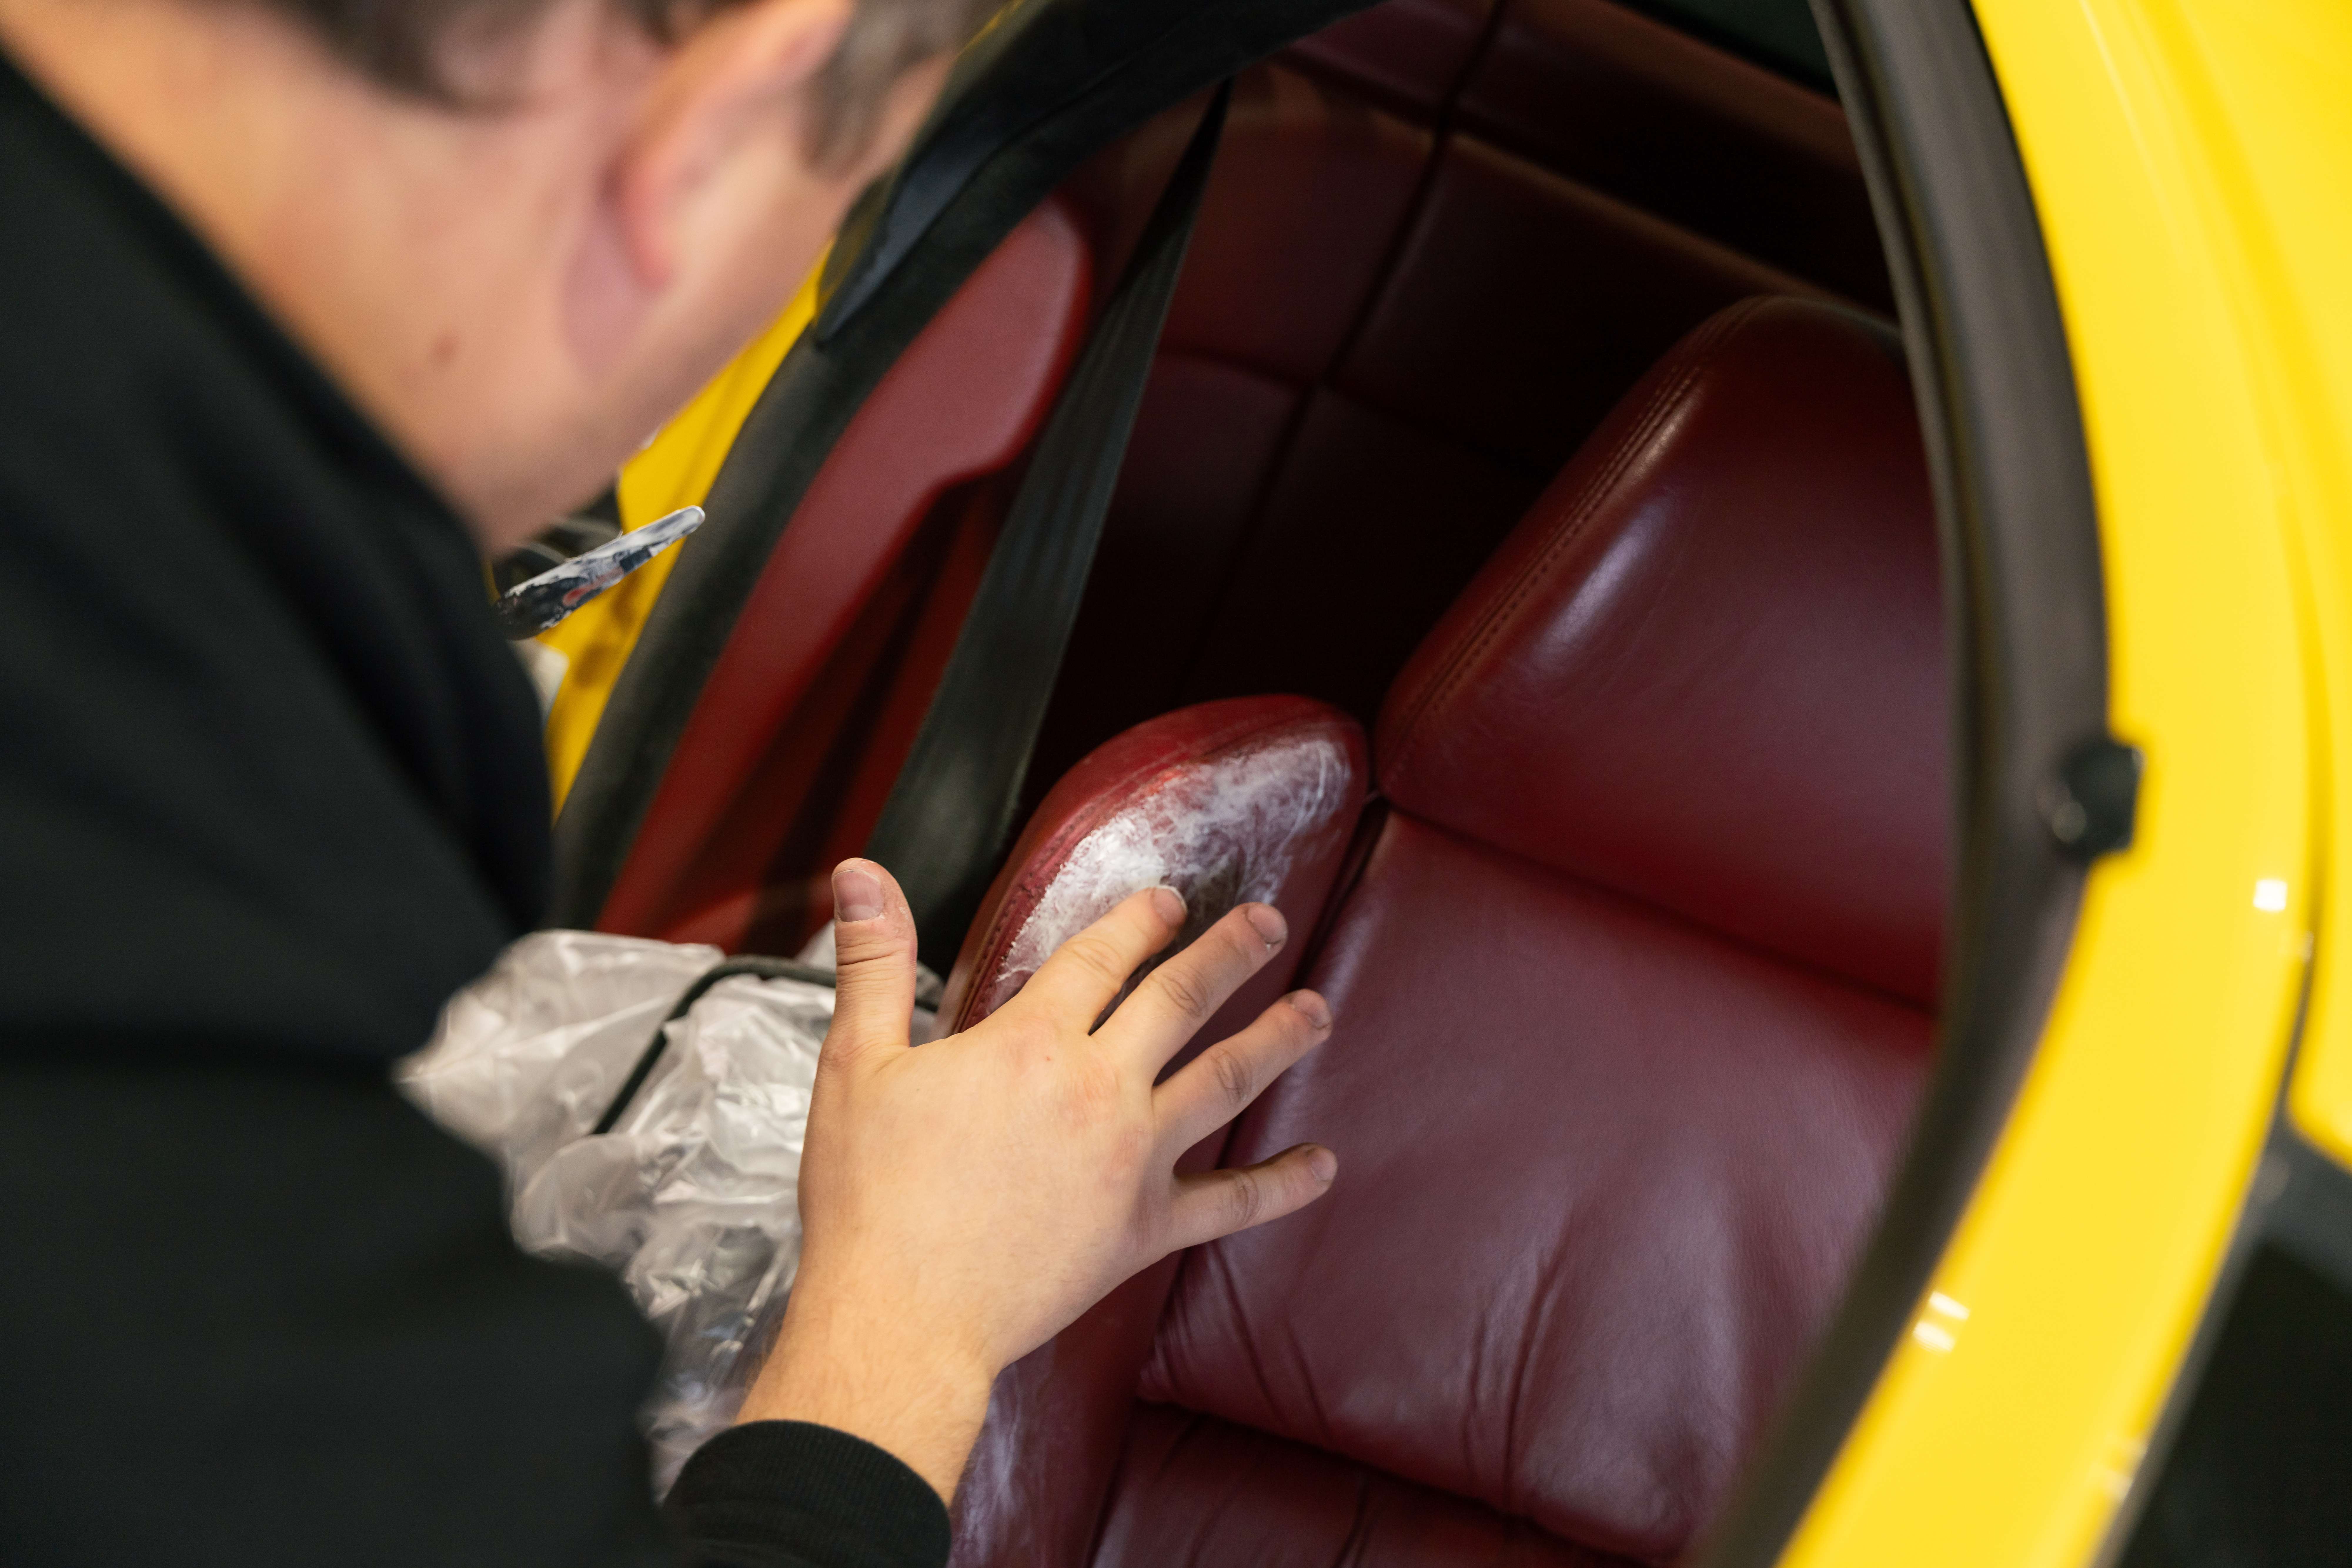
Applying filler and cleaning compound to prepare surface for colour restoration
DIY Repair Tips for Minor Damage
Proceed with caution: DIY repairs can worsen damage if done incorrectly. For anything beyond light scratches, we recommend professional assessment to avoid costly mistakes.
Light Scratches & Scuffs
- • Clean area with damp microfiber cloth
- • Apply leather conditioner and massage in circular motions
- • For protected leather, use a matching leather polish or cream to fill scratches
- • Buff with soft cloth after 10 minutes
- • Repeat 2–3 times over a week—shallow scratches often "heal" with conditioning
Colour Fading (No Cracks)
- • Purchase a leather dye kit close to your leather colour
- • Test on hidden area first (under cushion, back of couch) to check colour match
- • Clean and prep surface thoroughly—dye won't stick to dirty leather
- • Apply dye in very thin coats with sponge, letting each dry 30 minutes
- • Expect 3–5 coats for even coverage. Thick coats will crack and peel later
When to Stop and Call a Pro
- • Damage is visible from standing distance (living room, car interior)
- • Cracks are wider than 1mm or edges are curling upward
- • You see foam or substrate underneath the leather
- • Colour matching looks wrong after testing
- • The item is expensive or sentimentally valuable
- • You've tried DIY and it didn't work—don't make it worse with more attempts
Professional Repair Results
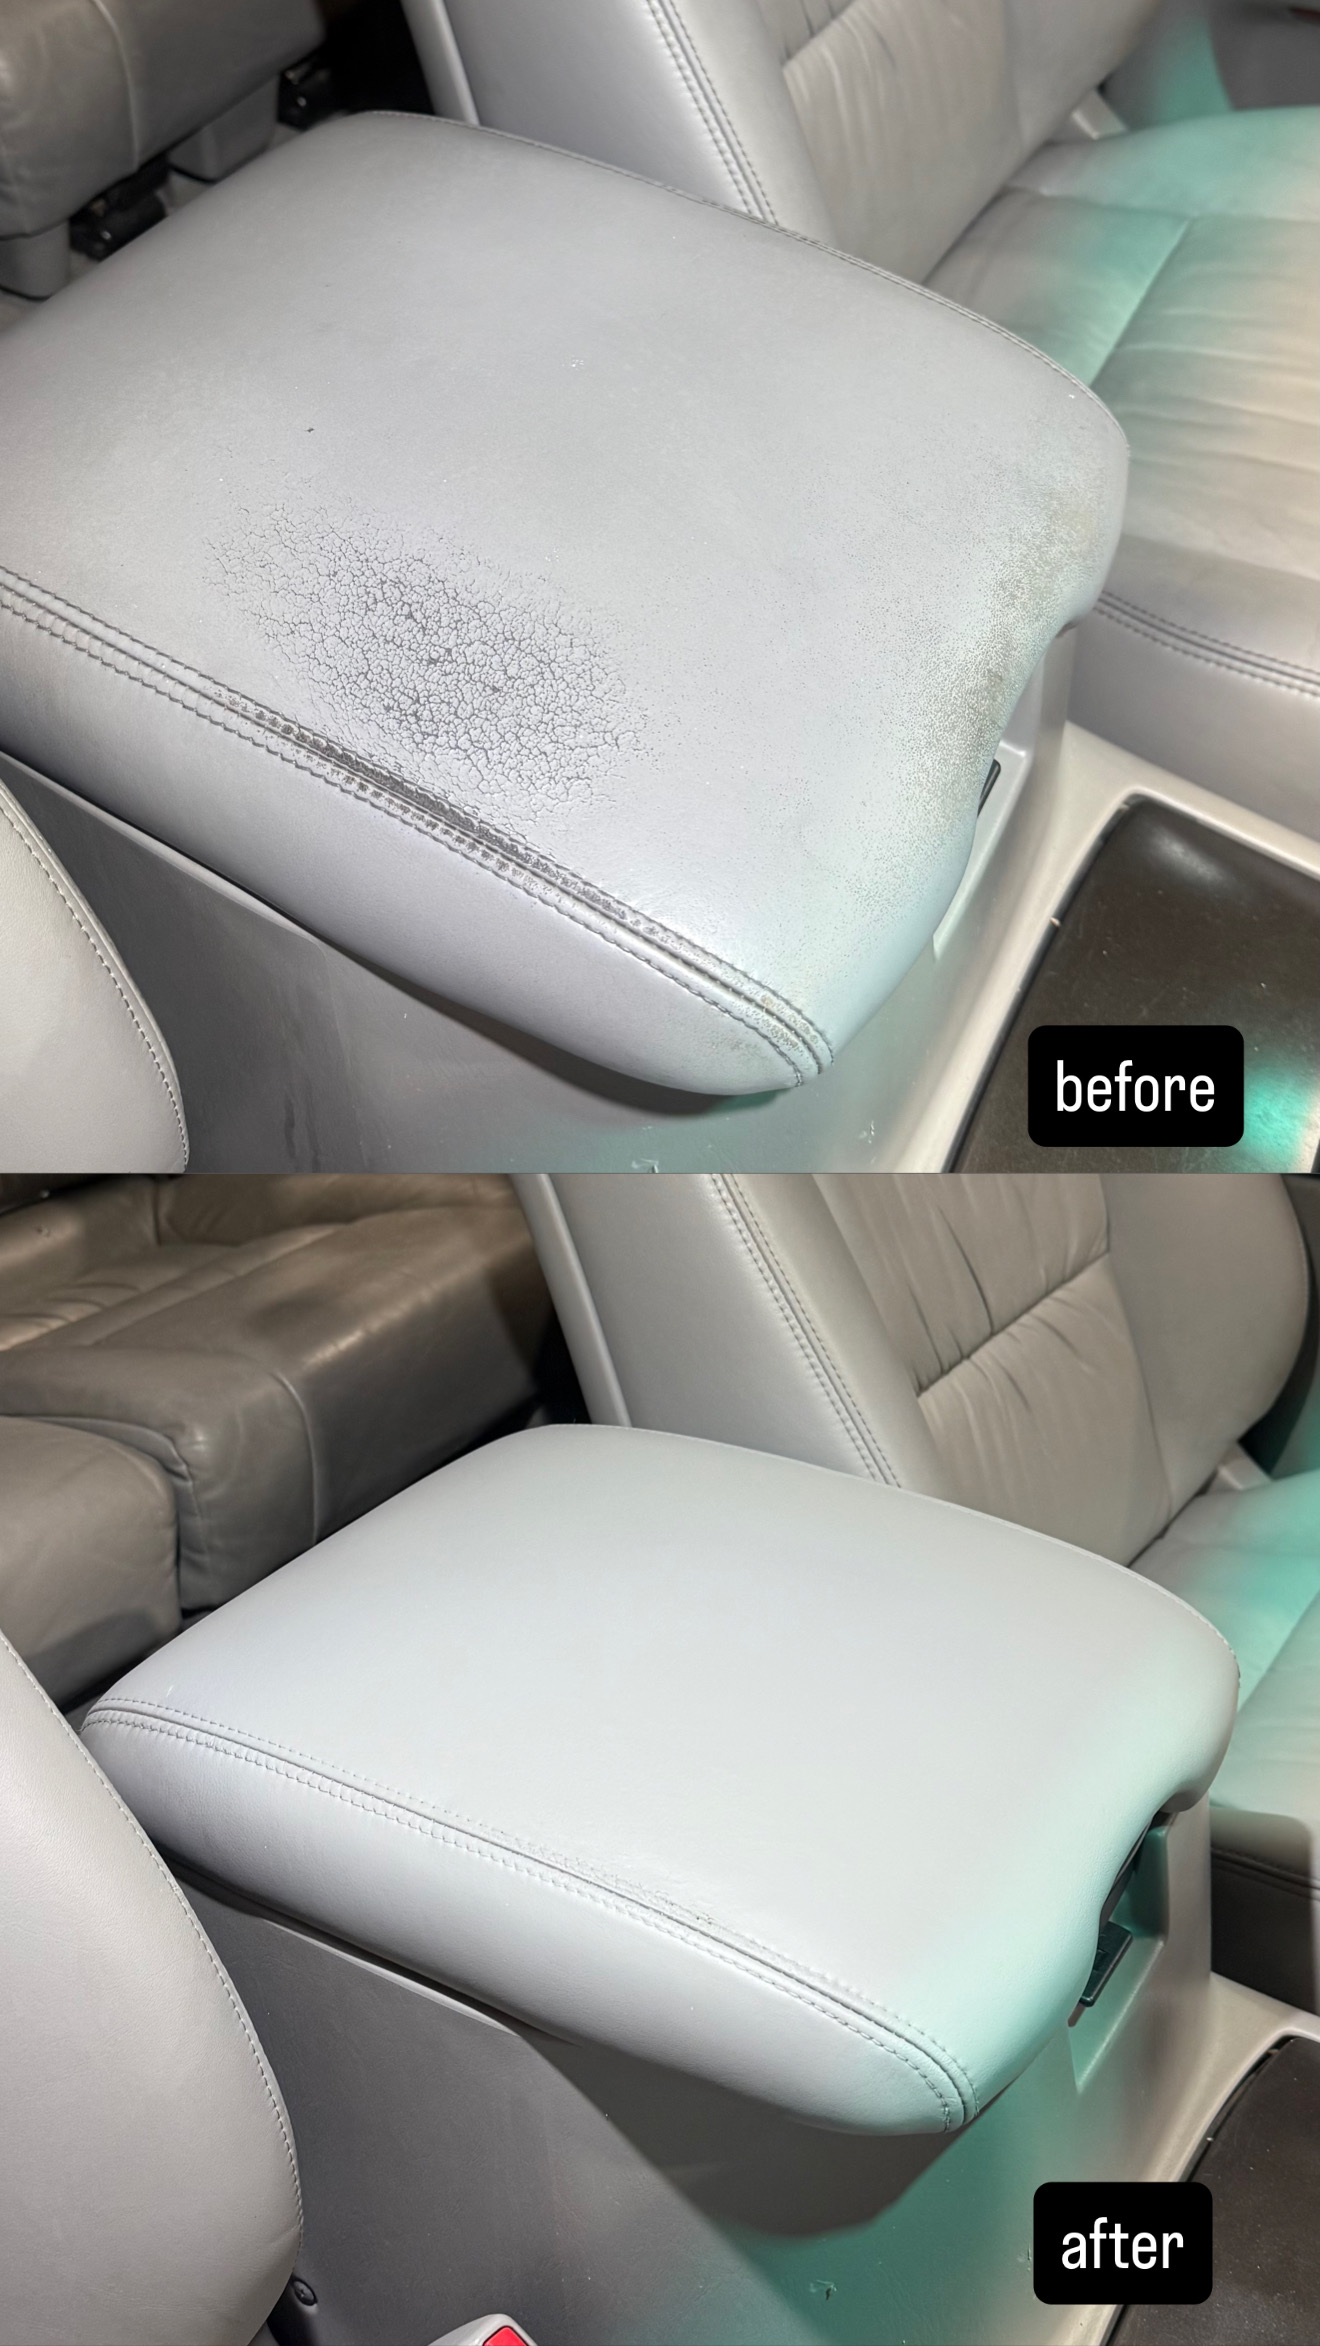
Center console stain removal & colour match
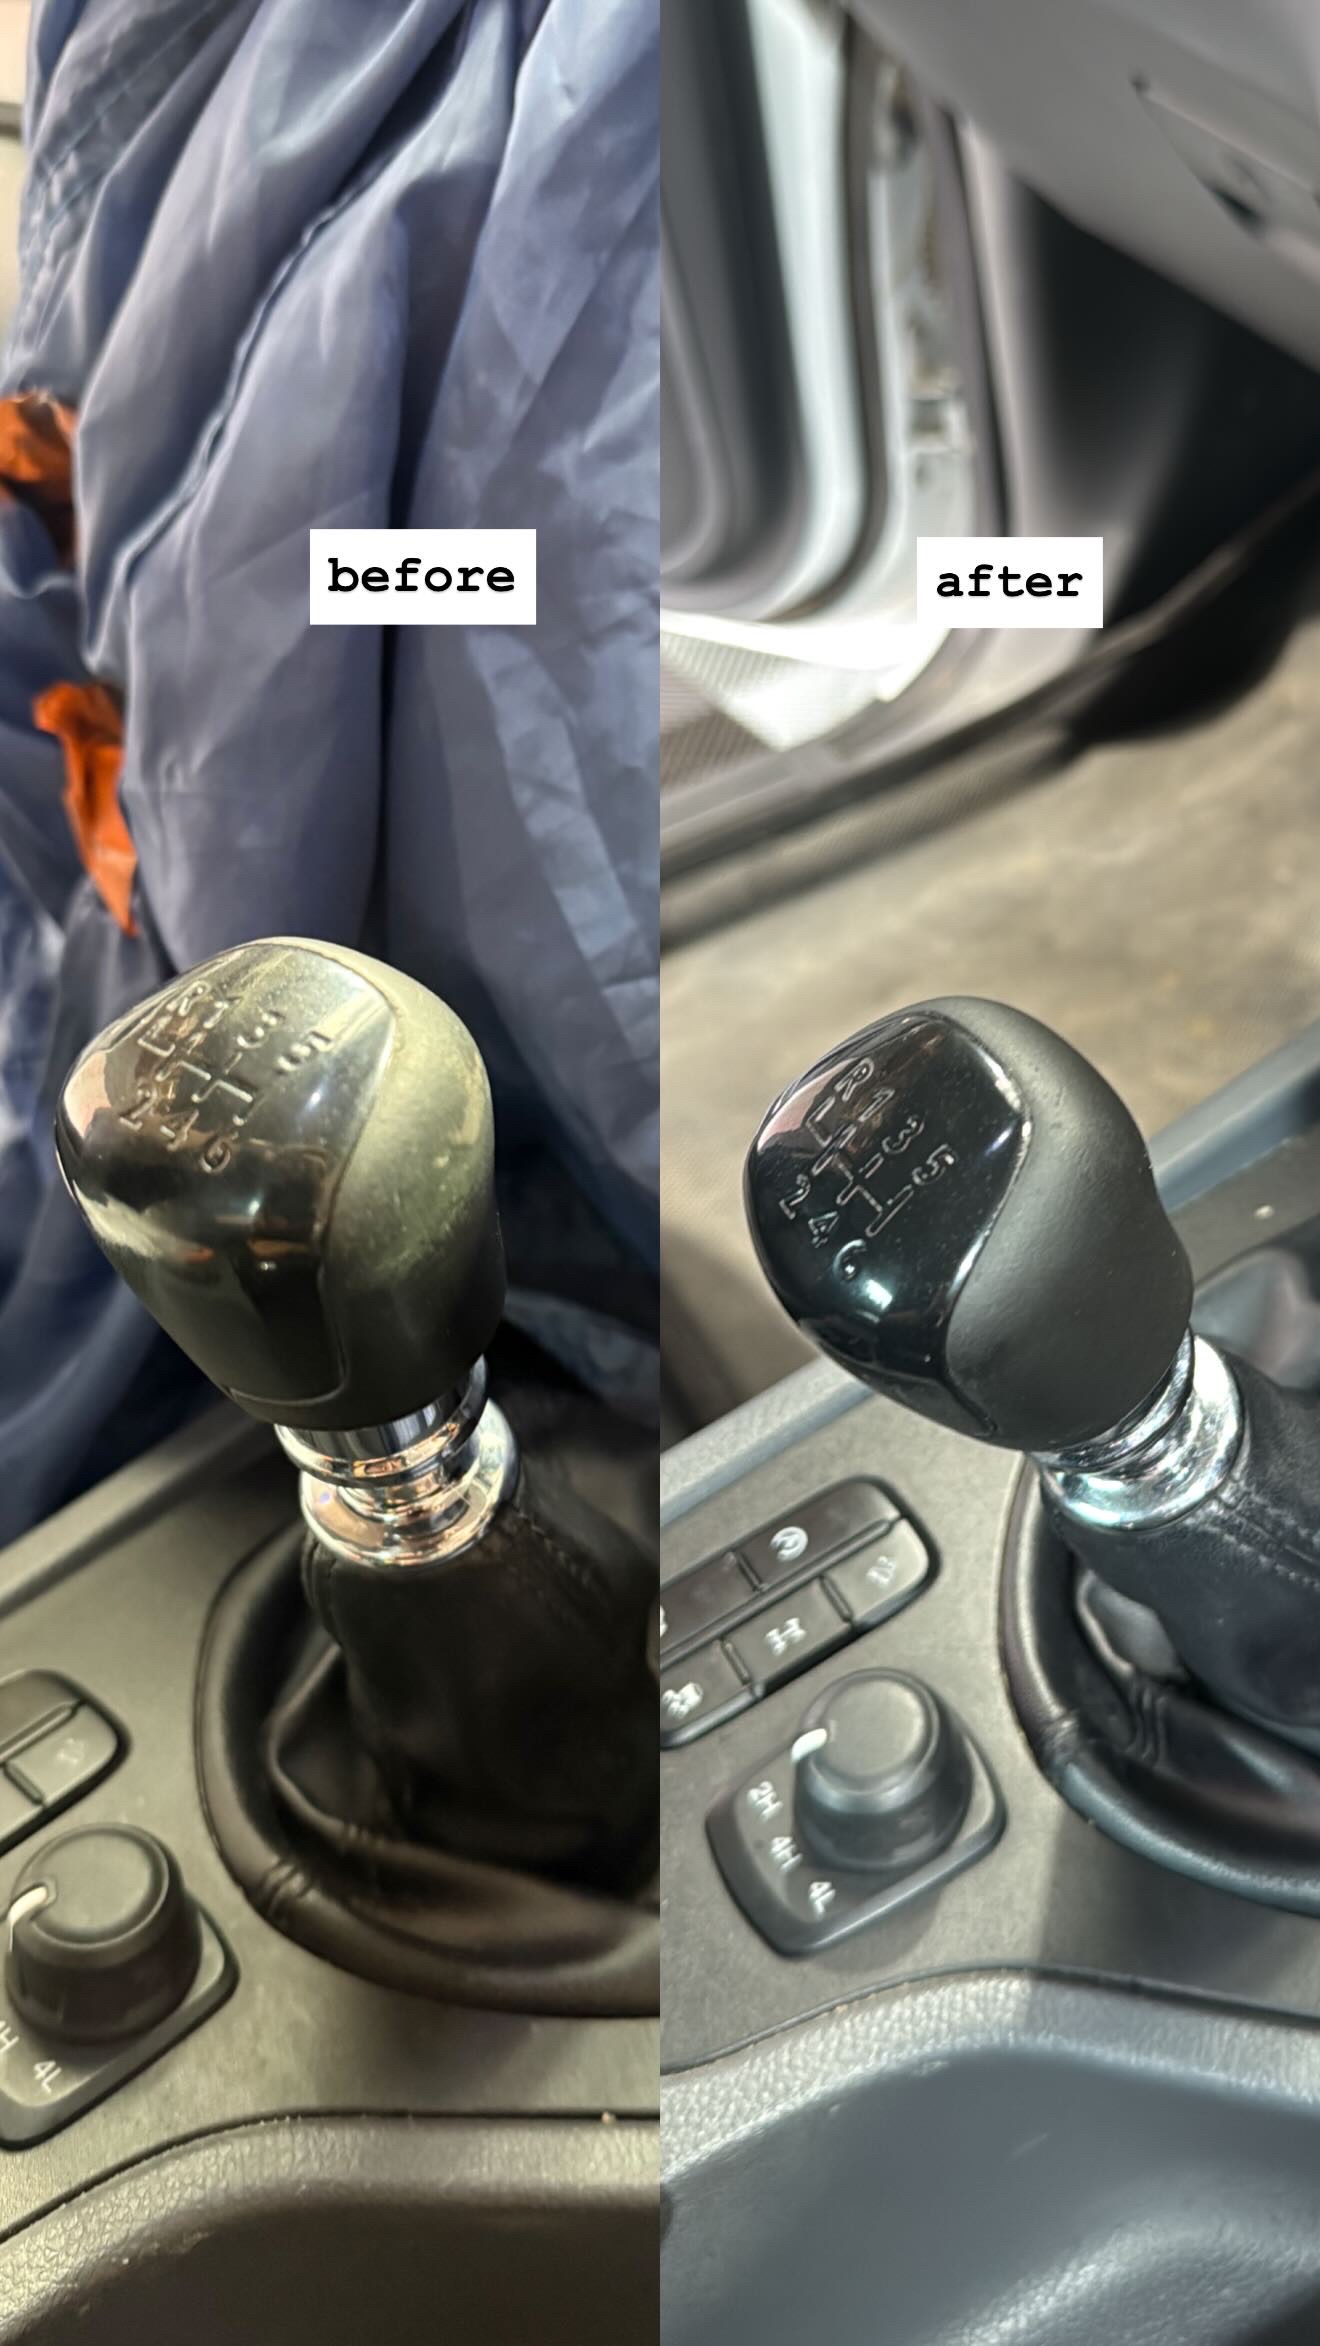
Shift knob colour restoration to factory black
Not Sure If Your Damage Is DIY-Friendly?
Send us photos for a free assessment. We'll let you know if it's worth trying yourself or if professional repair is the smarter choice.
Get Free AssessmentFree photo quote
Send a photo.
Get a real price today.
Quotes from photos are accurate, fast and obligation-free. Mon–Fri, 8:30 – 5:30. We reply within 2 business hours — your message goes directly to the technician.
100% satisfaction guarantee
If you're not satisfied with the result, we return and fix it — no charge, no argument. 15+ years of combined leather experience backs every job we take on.
What happens next
After you send your photo —
here's exactly what to expect.
- Step 01
Within 2 hours
You'll receive a detailed reply from your technician — not a call centre — with an honest assessment and written quote.
- Step 02
You confirm the booking
If the quote works for you, we lock in a time that suits. Mobile visit to your home or workplace.
- Step 03
Job done, same visit
Most repairs are completed in a single 3–5 hour visit. No second trips, no parts on order.